Originally posted on the Splunk official blog: https://www.splunk.com/en_us/blog/tips-and-tricks/add-a-tooltip-to-simple-xml-tables-with-bootstrap-and-a-custom-cell-renderer.html
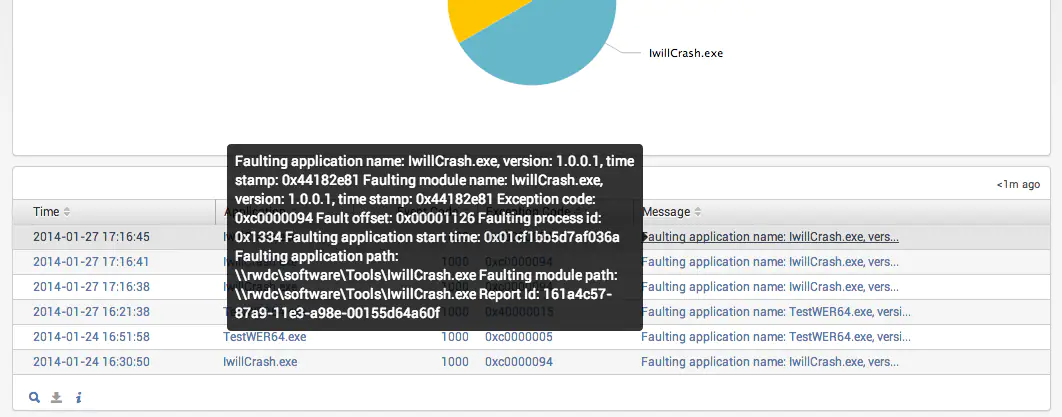
I recently created a dashboard that displayed some information from the Windows Event Logs in a table. The “Message” field was important, but took up a lot of screen real estate. Since a lot of Bootstrap is built right into Splunk 6, adding a little JavaScript allowed me customize the display to show the “Message” field when hovering over some text or icon.
Here is the result:
Continue reading for the explanation or just go download the example on GitHub.
Step 1 – add custom JavaScript and CSS to your form/dashboard
First things first – tell your dashboard or form that it will process additional JavaScript and CSS (optional).
<form stylesheet="app_crash.css" script="app_crash.js">
The .css and .js files should reside in SPLUNK_HOME/etc/apps/your_app/appserver/static/ Just create empty files for now. The content for these files will be discussed in the next steps.
Step 2 – give your table an ID
Next, we need to create a table in our Simple XML and give it a HTML ID that we can hook on to in our JavaScript file. Here’s mine:
<row> <table id="tblCrashReport">
...
Step 3 – wire up the JavaScript
This step is where the magic happens.
First, we need to wire up the table to the JavaScript. This is where we use the ID from step 2.
mvc.Components.get('tblCrashReport').getVisualization(function(tableView) { tableView.table.addCellRenderer(new CustomTooltipRenderer());
tableView.table.render();
});
Next, we code up the cell renderer. You will notice that I shorten the original text to display with ellipsis.
render: function($td, cell) { var message = cell.value;
var tip = cell.value;
if(message.length > 48) { message = message.substring(0,47) + "..." }
$td.html(_.template('<a href="#" data-toggle="tooltip" data-placement="left" title="<%- tip%>"><%- message%></a>', {
tip: tip,
message: message
}));
// This line wires up the Bootstrap tooltip to the cell markup
$td.children('[data-toggle="tooltip"]').tooltip();
}
Step 4 – override CSS (optional)
The last step is to override the Bootstrap CSS (if you want). Here is what I added to my .css file to make the tooltip a little easier for me to read:
.tooltip-inner { max-width: 400px;
text-align: left;
font-size: 14px;
font-weight: normal;
}