Originally posted on the Splunk official blog: https://www.splunk.com/en_us/blog/tips-and-tricks/rdp-to-windows-server-from-a-splunk-dashboard.html and https://www.splunk.com/en_us/blog/tips-and-tricks/rdp-to-windows-server-from-a-splunk-dashboard-example-code.html
Say you are browsing a Splunk dashboard and notice something odd in the data about a Windows server and you feel compelled to remote in to that server to do some more investigation. Sure, you could pull up your favorite RDP client and connect in. Or, you can save a couple of clicks and RDP to your server directly from the Splunk dashboard in one click.
Here is what the end results looks like in a dashboard:
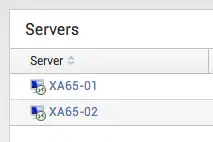
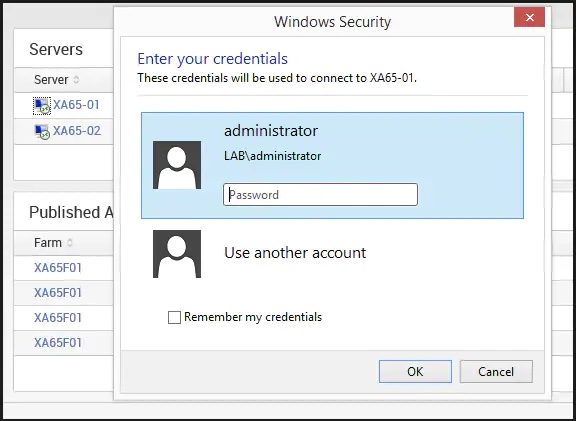
Clicking the RDP icon generates a .rdp file on the fly. Your system’s file type association picks up the .rdp file and launches the RDP client with the correct parameters filled in.
Generating a .rdp File on the Splunk Server
To open a remote Windows desktop via an RDP connection, you need to generate a .rdp file directing the RDP client what to do. This has to be done on the Splunk server side. In order to accomplish this, a Splunk controller is used. Here is the code for the controller (this code should go in a .py file in $SPLUNK_HOME/etc/apps/your_app/appserver/controllers):
import logging, cherrypy
import splunk.appserver.mrsparkle.controllers as controllers
from splunk.appserver.mrsparkle.lib.decorators import expose_page
import splunk.entity

logger = logging.getLogger('splunk.appserver.controllers.refresh')

class RDPController(controllers.BaseController):

    @expose_page(must_login=True, methods=['GET'])
    def connect(self, server=None, domain=None, **kwargs) :
        try:
            self.settings = settings = splunk.clilib.cli_common.getConfStanza('rdp_settings', 'default')

            administrative_session = settings.get('administrative_session')
            if not administrative_session:
                administrative_session = "1"

            audiomode = settings.get('audiomode')
            if not audiomode:
                audiomode = "2"

            desktopwidth = settings.get('desktopwidth')
            if not desktopwidth:
                desktopwidth = "1436"

            desktopheight = settings.get('desktopheight')
            if not desktopheight:
                desktopheight = "925"

            if domain is None:
                domain = settings.get('domain')

            screen_mode_id = settings.get('screen_mode_id')
            if not screen_mode_id:
                server_port = "1"

            rdp_content = """administrative session:i:{administrative_session}
audiomode:i:{audiomode}
desktopwidth:i:{desktopwidth}
desktopheight:i:{desktopheight}
domain:s:{domain}
full address:s:{full_address}
screen mode id:i:{screen_mode_id}""".format(
                administrative_session = administrative_session,
                audiomode = audiomode,
                desktopwidth = desktopwidth,
                desktopheight = desktopheight,
                domain = domain,
                full_address = server,
				screen_mode_id = screen_mode_id)

            cherrypy.response.headers["Content-Disposition"] = "attachment; filename=connect.rdp"
            cherrypy.response.headers["Content-Type"] = "application/rdp"

        except Exception, e:
            logger.exception(e)
            if hasattr(e, 'extendedMessages') and e.extendedMessages:
                errorMessage = e.extendedMessages[0]['text']
            else :
                errorMessage = e
            rdp_content = "Error occurred " + e.__class__.__name__ + " " + unicode(errorMessage)

        return rdp_content
You can see from the code that certain settings are reading from a rdp_settings.conf file. This file contains defaults. If defaults are not specified in the .conf file, the Python code takes care of defaults instead. Anyway, here is the rdp_settings.conf file:
# The following settings are the default setting used to RDP to a remote system.
# Additional values can be specified, but rdp_handler.py will need to be updated to reflect these additional values.
# More information -> http://technet.microsoft.com/en-us/library/ff393699(v=ws.10).aspx
[default]
# administrative_session
# 0 = When connecting to the remote computer, do not use the administrative session.
# 1 = When connecting to the remote computer, use the administrative session.
administrative_session = 1
# audiomode
# 0 = Play sounds on the local computer (Play on this computer)
# 1 = Play sounds on the remote computer (Play on remote computer)
# 2 = Do not play sounds (Do not play)
audiomode = 2
# desktopwidth = resolution width (in pixels) of remote session desktop
desktopwidth = 1436
# desktopheight = Resolution height (in pixels) of remote session desktop
desktopheight = 925
# domain (optional) = the name of the domain that will be displayed in RDC
# This parameter can also be passed via URL.
domain =
# screen_mode_id = determines whether the remote session window appears full screen when you connect to the remote computer by using Remote Desktop Connection (RDC).
# 1 = The remote session will appear in a window.
# 2 = The remote session will appear full screen.
screen_mode_id = 1
Update (or create) web.conf
In order for the controller to work, you will need an endpoint defined in $SPLUNK_HOME/etc/apps/your_app/default/web.conf. Just add the following:
[endpoint:rdp]
Add a Custom Cell Renderer to add the Icon
The last step is to render the link to launch the controller to generate the .rdp file. To do this, we use a custom cell renderer. I previously blogged about this by Using Bootstrap Modal with Simple XML.
Here is the JavaScript used for the custom cell:
require([
    'underscore',
    'jquery',
    'splunkjs/mvc',
    'splunkjs/mvc/tableview',
    'splunkjs/mvc/simplexml/ready!'
], function(_, $, mvc, TableView) {

    var CustomIconRenderer = TableView.BaseCellRenderer.extend({
        canRender: function(cell) {
            return cell.field === 'Server';
        },
        render: function($td, cell) {

            var server = cell.value;

            $td.html(_.template('<a href="/custom/RDP_Example/rdp/connect?server=<%- server%>" title="RDP to server: <%- server%>"><img src="/static/app/RDP_Example/images/rdp.png" /></a> <%- server%>', {
                server: server
            }));
        }
    });

    mvc.Components.get('tblServers').getVisualization(function(tableView) {

        // Register custom cell renderer
        tableView.table.addCellRenderer(new CustomIconRenderer());

        // Force the table to re-render
        tableView.table.render();
    });

});
If you learn better by example (like I do), then there is a GitHub repo that has a working example for you. In the example, I am just using a lookup file to list some servers, but you would use a “real” search for your environment. Anyway, the link is below: