Originally posted on the Splunk official blog: https://www.splunk.com/en_us/blog/tips-and-tricks/using-html5-input-types-on-splunk-forms.html
Text inputs on Splunk forms allows for free-form user input. However, there are times when you need to control the type of this data input. HTML5 has several input types that control what can be entered in text boxes and how the text box behaves during user input. Wouldn’t it be cool if you could apply these HTML5 input types to Splunk text boxes? Hint: the answer is “yes”. Read on to find out how.
What we will be creating
We will control text box inputs using JavaScript. Below is a screen shot of the final product:

This is basically a 2 step process:
- Create a Simple XML form
- Wire up some JavaScript to manipulate the text fields in the form
Creating a Splunk Form
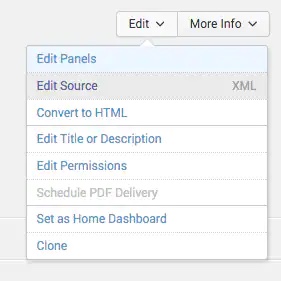
First, create a Splunk Form. Next, add a text input to the form (pretty easy so far). Finally, we need to edit the source of the form by clicking Edit > Edit Source.
The first trick is to add a reference to a JavaScript file (we will create the file in the next step). This JavaScript file will add all the necessary attributes we want to add to our text boxes.
<form script="set_input_types.js">
The next trick is to give your inputs unique IDs. You can see from the example below, that I gave my first text input an id of “numbers_only”.
<input type="text" token="numbers" id="numbers_only" searchWhenChanged="true">
    <label>Numbers only</label></input>
That’s it for the XML in the form, so go ahead and save your form.
Note: you might think that you could just change the input type to number at this point (example <input type="number" token="numbers" />) but you cannot. Let me save you the trouble and show you what you will get if you try to do this:

Using JavaScript to add Attributes
Now, we need to create the JavaScript file referenced in the step above. This file should live in the same relative directory as your Splunk form. For example, if I am creating the form in the context of the search application, the JavaScript file should go in the following directory:
$SPLUNK_HOME/etc/apps/search/appserver/static
Similarly, if I am creating my form in the context of a custom application (let’s call it SplunkInputTypesExample – which just so happens to be the name of the example in the example GitHub repo listed below), the file should go in the following directory:
$SPLUNK_HOME/etc/apps/SplunkInputTypesExample/appserver/static
You get the picture…
Here is the JavaScript necessary to control the text box created above:
require(["jquery", "splunkjs/mvc/simplexml/ready!"], function($) {
      $("[id^=numbers_only]").attr('type','number')});
You can see from above, that we are looking for a HTML ID that starts with “numbers_only” and setting an attribute of type=”number”.
Note about using the caret in the jQuery selector. We need to look for element IDs that start with the specified ID because Splunk will render extra characters to the end of our specified ID in the form XML. Here is the final text box input rendered by Splunk in HTML:
<input type="number" id="numbers_only_2230-input" value="10">
Adding Even More Attributes
Here is my final JavaScript to render several properties on several text boxes:
require(["jquery", "splunkjs/mvc/simplexml/ready!"], function($) {

    $("[id^=numbers_only]")
		.attr('type','number')


	$("[id^=numbers_0_100_step10]")
		.attr('type','number')
		.attr('min','0')
		.attr('max','100')
		.attr('step','10')

	$("[id^=date]")
		.attr('type','date')

	$("[id^=date_restrictions]")
		.attr('type','date')
		.attr('min','2016-01-02')

	$("[id^=range]")
		.attr('type','range')
		.attr('min','0')
		.attr('max','10')

});
As always, if you want to play around with a complete working example, head on over to the GitHub repo.