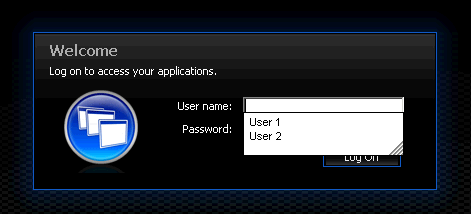
The logon page for Citrix Web Interface explicitly disables the web browser functionality of saving form data. But, what if you want to let your users save their username (especially if they have a particularly long UPN)? This article will show you how to enable AutoComplete functionality for both Web Interface 4.x and 5.x.
Disclaimer – I would highly recommend only implementing this solution in a secure internal environment. You do not want your usernames or passwords floating around out there in the public.
How Web Interface disables AutoComplete
Web Interface hasn’t always disabled the AutoComplete functionality of web browsers. I actually think it is wise Citrix did start disabling AutoComplete by default because a lot of Web Interface sites are external-facing and AutoComplete can be a bad thing in an external scenario. The way Web Interface disables AutoComplete is by adding a property to the <form> tag in the HTML. Simply adding autocomplete=”off” will disable AutoComplete for all <input> elements within the <form>. If you look at the rendered WI login page’s HTML, you will see <form… autocomplete=”off”>.
Enabling AutoComplete for Web Interface 4.x
Enabling AutoComplete for Web Interface 4.x is actually quite simple. All you really need to do is get rid of the autocomplete=”off” property in the <form> tag. To do this:
Modify loginView.ascx
Change this: <form method="POST" action="<%=PAGE_LOGIN%>" name="NFuseForm" autocomplete=”off”>
To this: <form method="POST" action="<%=PAGE_LOGIN%>" name="NFuseForm">
A possible downside to this is that passwords will be saved as well. If you do not want passwords to be saved, you can tell just the password field to disable AutoComplete. To do this:
Modify loginMainForm.inc
Change this: <input type='password'…
To this: <input autocomplete="off" type='password'…
Enabling AutoComplete for Web Interface 5.x
Enabling AutoComplete for web Interface 5.x is the same as enabling AutoComplete in Web Interface 4.x with one exception. Web Interface 5.x does not use a <input type=”submit” /> button to submit form data. Instead, Web Interface 5.x uses JavaScript to submit the form data. This causes an issue with AutoComplete because AutoComplete only commits data to Protected Storage via a <input type=”submit” /> button. So, to get around this bug “feature”, we need to do some trickery.
Since AutoComplete only works with <input type=”submit” /> buttons, we need to add one of these buttons to our login page. We do not actually want to see this button since it is just there to facilitate the AutoComplete functionality, so we set the display style on the submit button to none (<input type=”submit” style=”display: none” />)
Finally, we need to manipulate the Web Interface JavaScript code that submits to form to tell it to “virtually press” our hidden submit button (this will cause AutoComplete to save the data). Here are all the steps necessary to implement AutoComplete in Web Interface 5.x:
Step 1 – Modify layout.ascx
Change this: <form method="post" action="<%=FormAction%>" name="<%=Constants.ID_CITRIX_FORM%>" autocomplete="off">
To this: <form method="post" action="<%=FormAction%>" name="<%=Constants.ID_CITRIX_FORM%>">
Step 2 – Modify loginMainForm.inc
Add the following to the bottom (right after </table>):
<input type="submit" value="submit" id="hiddenSubmitButton" style="display:none" />
This is our hidden fake submit button that will trigger AutoComplete to save the data.
Step 3 – Modify login.js
Change this:
function submitForm() {
    if (!isSubmitted) {
        changeLoginBtnColor(false);

        isSubmitted = true;

        var loginBtn = document.getElementById("loginButtonWrapper");
        if(loginBtn){
            loginBtn.style.color = "#aaaaaa";
        }

        disableLinks();

        document.forms[0].submit();
    }
}
To this:
function submitForm() {
    if (!isSubmitted) {
        changeLoginBtnColor(false);

        isSubmitted = true;

        var loginBtn = document.getElementById("loginButtonWrapper");
        if(loginBtn){
            loginBtn.style.color = "#aaaaaa";
        }

        disableLinks();

        <span style="background-color: yellow;">var hiddenSubmitBtn = document.getElementById("hiddenSubmitButton");
        if(hiddenSubmitBtn.click) {

                hiddenSubmitBtn.click();
        }
        else {</span>
                document.forms[0].submit();
        <span style="background-color: yellow;">}
        return false;</span>
    }
}
The highlighted code basically tells the JavaScript submit function to “virtually click” the hidden submit button we added to loginMainForm.inc.
Again, if you want to disable passwords from being saved, add autocomplete=”off” to all the <input type=’password’ … /> fields in loginMainForm.inc.
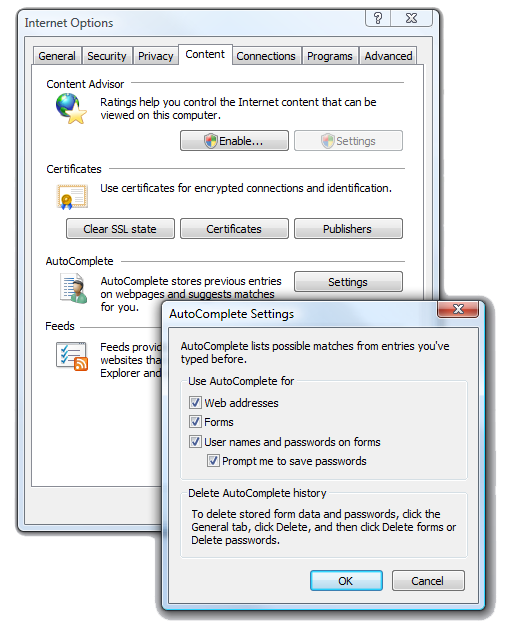
Other factors of using AutoComplete In order for AutoComplete to save form data, the feature needs to be turned on in your web browser. For Internet Explorer, this can be found by going to Tools -> Internet Options -> Content tab.
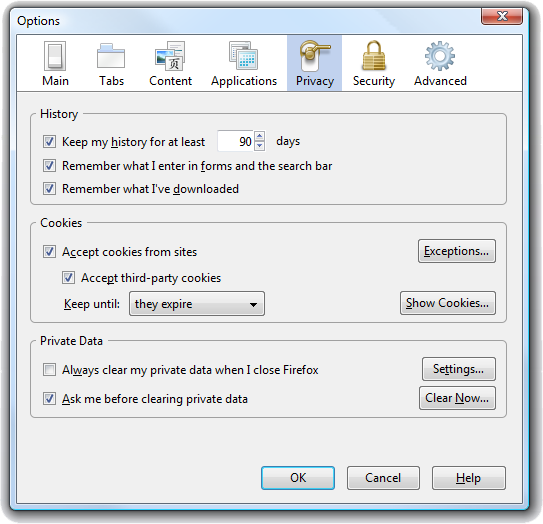
For Firefox, this can be found by going to Tools -> Options -> Privacy.
AutoComplete stores form data in Protected Storage – which means that the Protected Storage service needs to be running. Protected Storage can, on occasion, get corrupted. See this Microsoft support article about this situation: http://support.microsoft.com/kb/306895


